Cebu Blue Pothos Propagation
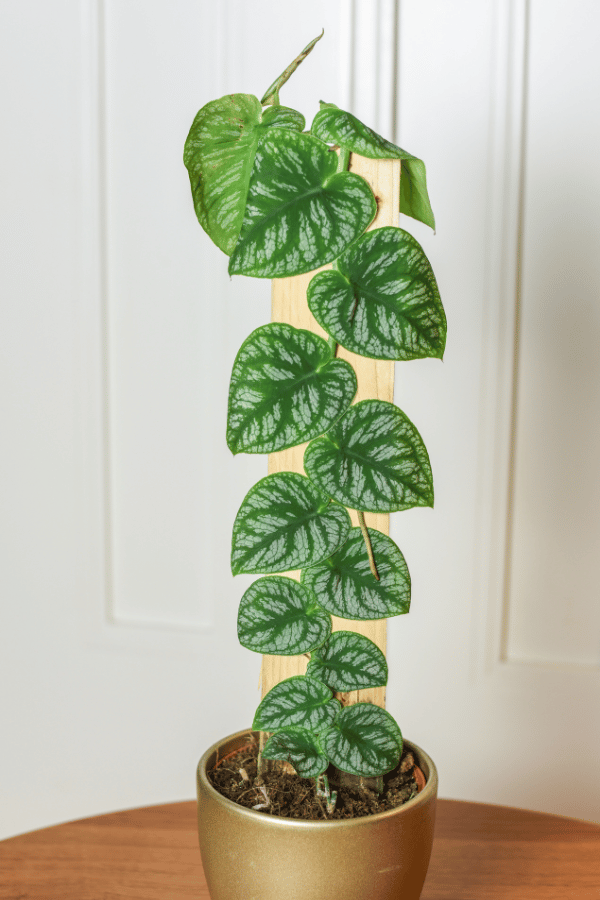
Cebu Blue Pothos is one of my favorite pothos plants! The elongated leaves that are blue-green make this such a unique pothos! But the Cebu Blue can be a hard plant to find in stores and when you do, you may be shocked at the price tag. If you own a Cebu Blue Pothos, you’re in the right place to learn how to get new plants for free by Cebu Blue Pothos propagation!
Propagation is the process of creating new plants from existing ones. With the Cebu Blue Pothos, this can be done in a variety of ways, including stem cuttings, leaf cuttings, and air layering. Each method has its unique benefits and challenges, so it’s important to understand the differences before deciding which one to use. Regardless of your chosen method, the result will be a beautiful new plant that you can enjoy for years to come.
When to Propagate Cebu Blue Pothos

If you want to propagate your Cebu Blue Pothos, the best time to do so is during the spring or early summer months. This is when the plant is in its active growing phase and will have the best chance of successfully rooting new cuttings.
Choosing a healthy and mature Cebu Blue Pothos plant to take cuttings from is important. Look for a plant that has several long and healthy stems with plenty of mature leaves. Avoid taking cuttings from a plant that is stressed or struggling, as this can reduce the chances of successful propagation.
When taking cuttings, make sure to use clean and sharp pruning shears to avoid damaging the plant. Cut a stem at least 6 inches long with several leaves attached. Remove the bottom leaves from the stem, leaving only a few at the top.
Once you have your cutting, you can either place it in water or soil to root. Water propagation involves placing the cutting in a jar or vase filled with water, ensuring the stem’s bottom end is submerged. Soil propagation involves planting the cutting in a pot filled with well-draining soil, ensuring the soil is moist but not soggy.
How to Take Good Cuttings from Cebu Blue
Taking good cuttings is crucial to successfully propagating your Cebu Blue Pothos. Here are the steps you need to follow to ensure success:
Choose a healthy stem: Look for a stem that is at least 4-6 inches long and has several leaves. Make sure the stem is healthy, mature, and free from any signs of disease or pests.
Prepare your tools: Use a clean, sharp pair of pruning shears or scissors to make a clean cut. You can also use a rooting hormone powder to encourage root growth.
Make the cut: Cut the stem just below a node (where a leaf is attached). This is where new roots will form. Remove any leaves from the bottom 1-2 inches of the stem.
Apply rooting hormone (optional): Dip the cut end of the stem into rooting hormone powder to encourage root growth.
Put the cutting into a medium: Place the cutting either in a pot filled with moist potting soil (bury the node) or in a container filled with room temperature water.
Care for the cutting: Keep the soil moist but not waterlogged. Place the pot in a bright, indirect light location. You can cover the pot with a clear plastic bag to create a mini greenhouse and increase humidity.
Wait for roots to form: It may take several weeks for roots to form. Once the cutting has rooted, you can transplant it into a larger pot or give it away!
By following these steps, you can successfully propagate your Cebu Blue Pothos and enjoy more of these beautiful plants in your home.
Ways to Propagate Cebu Blue Pothos
If you want to propagate your Cebu Blue Pothos, there are two ways to do it.
First way to propagate is stem cuttings, like I mentioned above. Take a stem cutting that has at least two leaves and some nodes. Cut the stem just below a node and remove the bottom leaf. Place the cutting in water or soil and keep it moist until roots appear.
The second way to propagate Cebu Blue Pothos is air layering. Choose a healthy stem and make a tiny cut in the bark that shapes like a square. Apply rooting hormone to the cut and wrap it in damp but not soggy sphagnum moss. Cover the moss with either aluminum foil or plastic wrap and secure it with a rubber band. Once roots appear, cut the stem below the moss and plant it in soil.
Regardless of your chosen method, keep the new plant in a warm, humid location with bright, indirect light. Water it regularly and get a balanced liquid fertilizer and fertilize according to package instructions.


